![Choicely App Logo.png]](https://www.choicely.com/hs-fs/hubfs/Choicely%20App%20Logo.png?width=40&height=40&name=Choicely%20App%20Logo.png)
To publish an app on Google Play you need a Google Play Developer account. There's a one-time $25 registration fee (no yearly renewal), and Google now requires identity verification for every new developer — so have your ID ready. If you're registering as an organization, you'll set up an organization account and confirm a few business details. This guide takes you through the whole process, step by step. (Updated September 2026.)
Want a shortcut? Choicely can do this with you. Publishing through Choicely? The Publish Assistant walks you through creating your Google Play Developer account, generates your store listing, pre-checks Google's policy requirements, and submits your app. Start free at studio.choicely.com/sign-in
When you create a Developer account for your organization, you can start publishing Android apps on the Google Play store.
What changed in 2026
Two things matter this year. First, Google is expanding developer verification across Android: identity checks that used to apply only to Play Console accounts are being extended, so apps from unverified developers will face installation restrictions on certified Android devices. Enforcement begins on 30 September 2026 in Brazil, Indonesia, Singapore and Thailand, and expands globally in 2027. If your organization's account is properly verified, nothing changes for you.
Second, the closed-testing rule for new personal accounts remains firmly in place: 12 testers, opted in continuously for 14 days, before an app can go to production. Organization accounts are exempt — one more reason this guide sets you up as an organization.
Does the verification change affect you? Probably not — here's the two-minute check: open Play Console and confirm your apps show as registered. Google registered 99% of existing Play apps automatically in March 2026, and if you create your organization account by following this guide, verification is part of the process. The cases that need action are apps distributed outside Google Play and the unregistered 1% — our guide to Android developer verification walks through both.
The registration fee is still a one-time $25. The pattern is clear: Google keeps raising the bar on who can publish, and a verified organization account is the most durable way to stay ahead of it.
1. What you'll need to create a Google Developer account
Before we begin, here’s what you’ll need for creating the account:
- a D-U-N-S number – which is an international business ID number
- A regular, personal Google Account that you can connect to your Google Play developer account
- Basic information of your organization – name, address, phone number, website
- Contact person name, email address and phone number – for Google to contact you
- Developer email address and phone number – shown as part of your developer profile on Google Play, for users to contact your organization
- A form of payment and 25 US dollars
- Official documents of your organization to verify identity – eg. certificate of incorporation or VAT registration certificate
- Official documents of yourself to verify your identity – for example, a passport or a driving license
- Registered ownership of your website in Google Search Console – or access to a person who does
Also, it’s beneficial if a person, who’s a Founder or a Director, handles this process. Validating the person and the company is more straightforward, when the person is named in the company registration documents.
2. How to get a D-U-N-S number for your Google Developer account
Now let’s start off with the D-U-N-S number! Google “International DUNS number” and select “Choose Your Country or Region”. Select your region and look for your D-U-N-S number on the site.
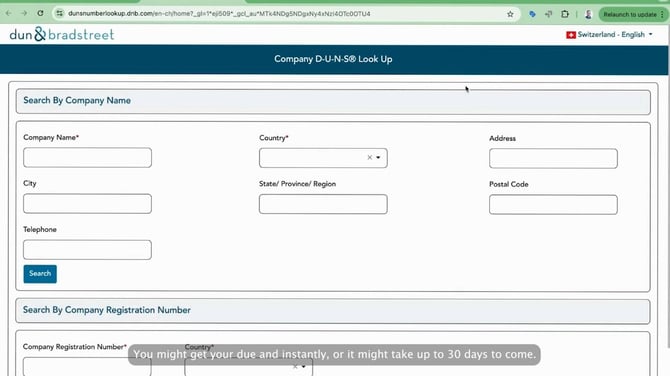
Click “Email” to get the D-U-N-S number emailed to you.
You might get your D-U-N-S instantly, or it might take up to 30 days to come – this varies by region.
While you wait for your D-U-N-S number, you can already build
Choicely's Publish Assistant pre-checks your app against Google Play's policies, generates the store listing, and then walks the submission through the Play Console with you once your account clears verification. By the time Google approves your organization, the app is ready to go the same day. The free plan includes 300 monthly credits — no card needed.
When you have received your D-U-N-S number and have all the necessary information at hand, it’s time to start the registration process!
3. Log in to Google Play Console and start your sign-up process
First go to play.google.com/console
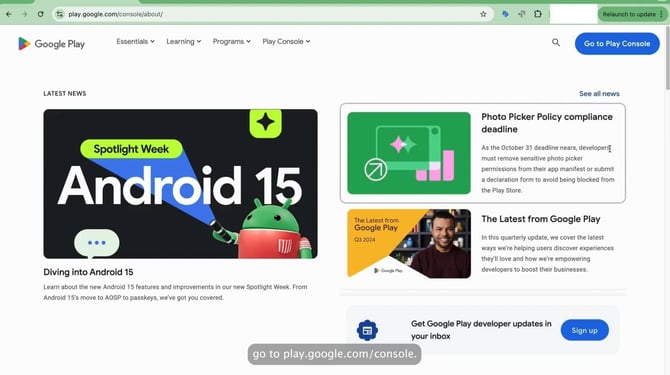
- Click to “Go to Play Console”
- Log in with your Google account
Then you can start creating your Play Console developer account
Choose the type of organization you represent.
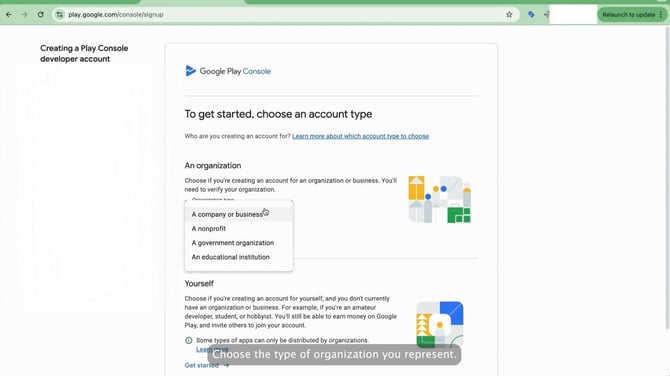
You need to have an organization to invite collaborators to your account so you can for example invite the Choicely team to take care of app publishing. Get started below the “Organization type” selection.
4. Establish your Google Developer account and Google payments profile
Write the developer name to represent your profile and apps in Google Play. It doesn’t need to be the official name of your organization, and it can be changed later.
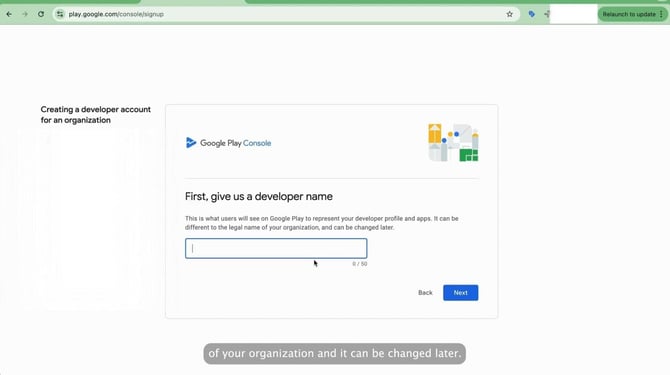
Next up, it’s time to link – or create – a payments profile to verify your organization. The payments profile is used in Google products, and it is used to manage your business information in one place. Click “Create or select payments profile”.
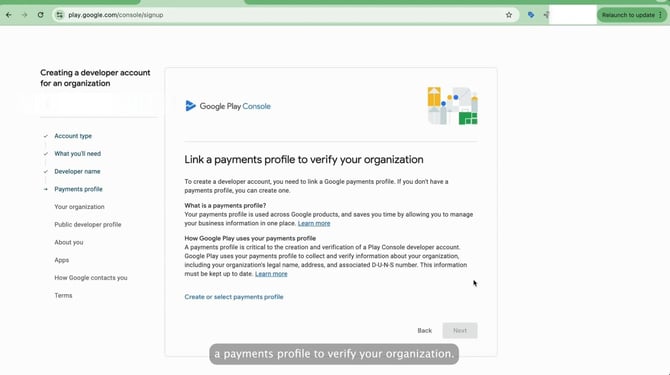
You can select and existing payments profile if you have created one. Or you can select to create a new one, and continue.
Now it is time to enter your D-U-N-S number. It has 9 digits and contains only numbers.
Once you’ve given the correct D-U-N-S number, a box with information about your company will appear. Click “Confirm” if it’s correct.
You’ll proceed to a screen where you can link your payments profile to verify your organization. Click “Next” to proceed.
5. Provide more information on your developer profile
Next up, you’ll be asked more information about your organization: number of employees, the main phone number, and your website – which you’ll need to verify later.
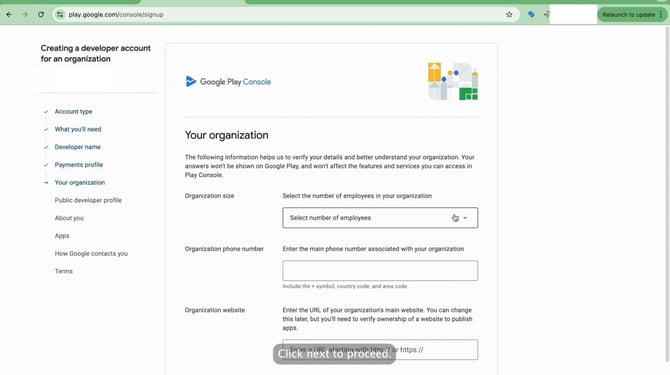
Click “Next”.
Here you will check and fill in the details of your public developer profile. It will show to the users of Google Play. Fill in the organization details. Write down the developer phone number and email address, both of which you also need to verify.
Later on, you can provide different contact details for app support.
On the next screen, Google asks you about your prior experience using Google Play, on building apps or Android development together. Give an appropriate answer and proceed by clicking “Next”.
Google will ask more background questions to understand their users. Give your approximate answer to how many apps you’re going to publish, and whether you’re planning to earn money on Google Play. Finally select if one of the app categories applies to apps your organization is going to publish.
6. Submit the contact information of your admin
Now Google wants to know the contact details of the admin of your account. These contact details won’t be shown publicly, they’re only used by Google to contact you.
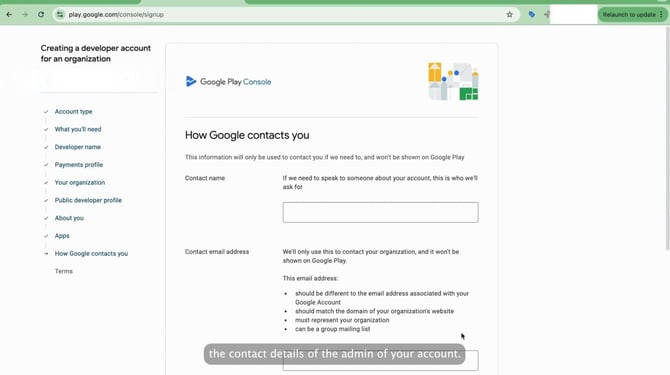
The email should be different from the one associated with your Google account. It should match with the domain of your organization, and represent your organization. It can also be a group mailing list address.
Fill in also your preferred language and the contact phone number of your organization. Click “Next”.
7. Review agreements and pay for the account
Now it’s time to review the Google Play Developer Distribution Agreement and Google Play Terms of Service. Tick the boxes to confirm.
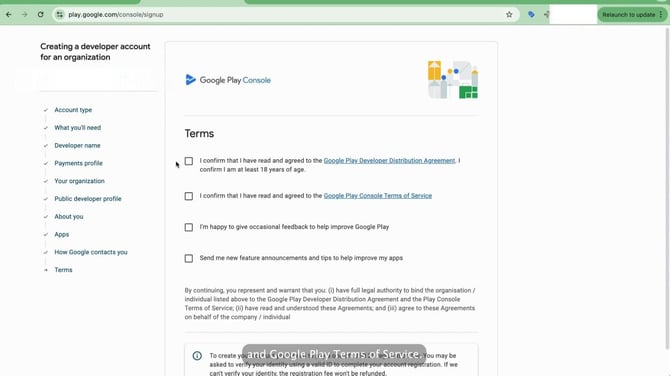
Next up you’ll be asked to pay the one-off 25 US dollar registration fee, and you may also be asked to verify your identity. The registration fee won’t be refunded if the verification fails. Click “Create account and pay”.
Click “Add credit or debit card” and fill in the details of your payment card.
Finally, click “buy” to confirm the payment from your card.
You’ll get a receipt of the payment to your email. Click “Go to Play Console”.
You have successfully created a Google Play developer account. You you still need to verify it.
8. Verifying the Google Play Developer account
There are two steps in the verification process. The first step is to verify your organization and your identity. The second step is to verify the website of your organization.
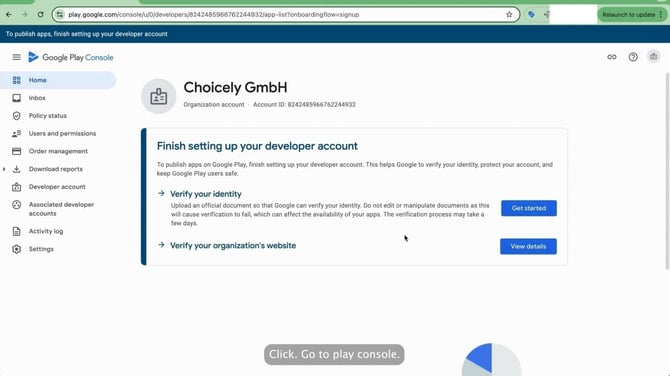
Verify your website
To verify your website, click “view details”.
To verify your website, your organization needs to have registered the website’s ownership in Google Search Console.
To verify your website successfully, make sure you either have administrator rights to your website in Google Search Console – or access to a person who has the rights.
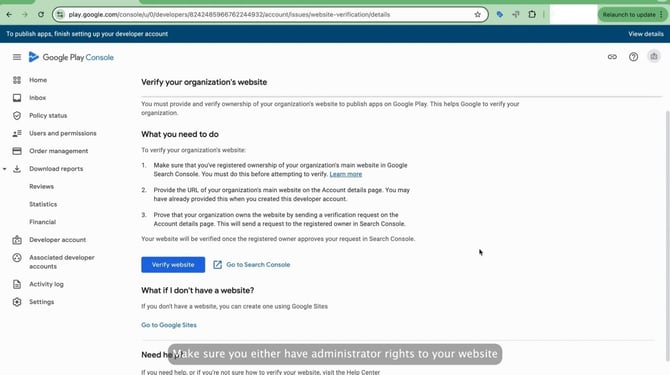
Click “Verify website”.
You’ll be asked Account details such as your developer name, organization size, phone number and website.
Below the website, click “Send verification request”.
This sends a verification request from Google Play Console to Search Console. Now you (or your coworker) need to log in to Search Console in https://search.google.com/search-console/
Make sure you’re using the right property.
Click the notification bell in the top right corner. You should see a new message where a user - you – wants to associate their Play Console account with your website property. Click to the message and approve the request by clicking the large blue button.
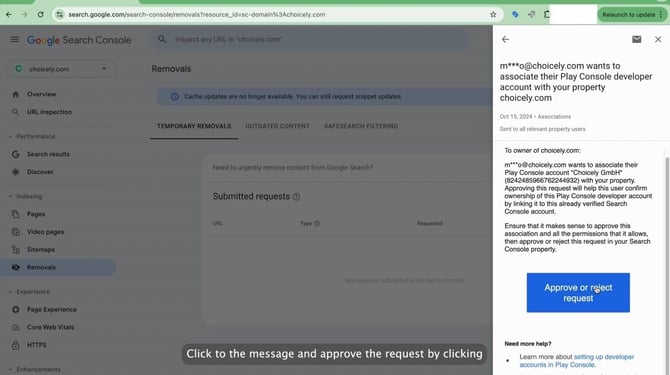
Your website has now been verified.
Verify your organization and your identity
To verify your organization and your identity, click “Get started”.
Review what kind of documents are acceptable – you’ll need one document for your organization and one for yourself. Make sure you have those documents at hand, and then click “Start verification”.
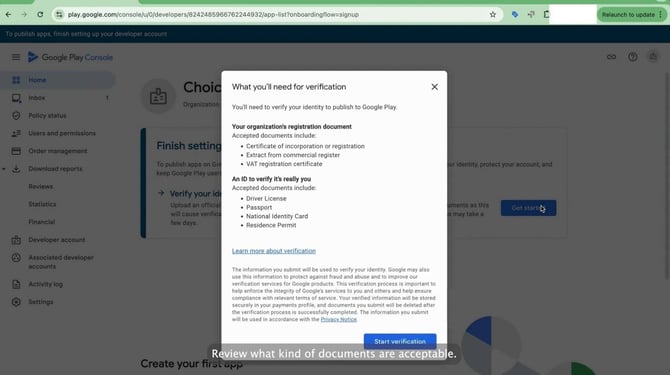
Follow the steps given by Google. First, upload a legal document of your organization: such as a certificate of incorporation or registration.
Follow through by giving your name and ID issuing country. Select what kind of ID you are uploading. Finally upload the ID and complete the form by giving your address.
After this you should be done with the verification. Google will review it and come back to you in a few days by email.
9. All done
Once your Google Play Console Developer account has been approved, your home page will look like this!
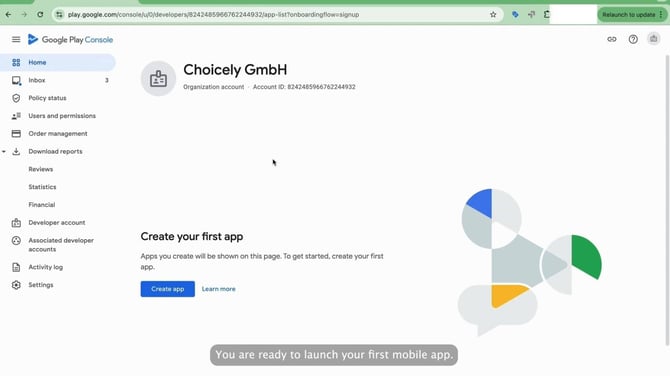
You are ready to launch your first mobile app!
Let Choicely handle the Google Play part
Once your Google Play Developer account is set up, Choicely's Publish Assistant prepares your store listing and walks your app through submission to Google Play — so publishing is the easy part.
Frequently asked questions
How much does a Google Play developer account cost?
$25 (USD), paid once when you register. Unlike Apple's $99-per-year membership, there's no annual renewal — the one-time fee covers the account for as long as it stays in good standing. You pay by card during sign-up, and the fee isn't refundable if verification fails, so have your documents ready first.
Should I register as an individual or an organization?
For any company, register as an organization. Organization accounts publish under your business name, support team access, and — most importantly — are exempt from Google's closed-testing requirement for new personal accounts. Personal accounts must run a 14-day closed test with 12 testers before publishing publicly; organizations skip that entirely.
What is the 12-tester rule, and does it apply to me?
Personal Google Play accounts created after November 13, 2023 must run a closed test with at least 12 testers continuously opted in for 14 days before they can apply for production access. Organization accounts are exempt. If you're publishing for a business, this alone is a strong reason to register as an organization.
What identity verification does Google require?
Google verifies both the organization and the person registering. Expect to provide official organization documents, a D-U-N-S number, an identity document for the account owner, and to verify your website through Google Search Console. Verification usually takes a few days once documents are in, and Google emails you if anything needs correcting.
Do I need to do anything about Android developer verification?
If you're registering a new organization account now, verification is built into the process. If you already publish on Google Play, open Play Console and check that your apps show as registered — Google did that automatically for 99% of apps in March 2026. Enforcement begins 30 September 2026 in Brazil, Indonesia, Singapore and Thailand, and worldwide in 2027. Only developers distributing outside Google Play, or the unregistered 1%, need to act.
Do I need a D-U-N-S number for Google Play?
Yes — organization accounts require a D-U-N-S number, the same nine-digit business identifier Apple uses. It's free to obtain. If your company doesn't have one yet, request it before starting sign-up: it can take up to 30 days to arrive depending on your region, and it's the slowest step in the whole process.
How long does the whole process take?
The sign-up itself takes under an hour. Identity and organization verification typically takes a few days after that. The D-U-N-S number is the wildcard — instant if your company already has one, up to 30 days if not. Realistically: same week if you have a D-U-N-S in hand, up to a month if you don't.
What do I need before starting?
Gather these first: a Google Account on your organization's own domain (not a personal Gmail), your D-U-N-S number, official company documents, an identity document for the account owner, your company website and phone number, and a card for the $25 fee. Ideally, the person registering is a founder or director.
Can I switch a personal account to an organization account later?
No — Google doesn't convert account types. You'd have to create a new organization account (paying another $25) and transfer your apps to it, which involves a support request and some waiting. If there's any chance you're publishing for a business, start with an organization account and save yourself the migration.
Account verified? Don't lose momentum
Publish Assistant pre-checks your app against Google Play policies, writes the store listing, and guides your first submission — the steps where most first-time publishers stall.
Next up in publishing your app:
- Have you already created an Apple Developer account?
- Have you created promotional pictures for your app store listings?